
Tradescraft has a lot in it, but you don't set it all up at once. This page is the map: do these steps in order and you'll be up and running. Each step links to a full walkthrough with pictures - come here for the order, click through for the detail.
The short version
- Sign in to your account.
- Set up your business - your name, logo and details.
- (If you have staff) Add your team.
- Add your first customer and the site you'll work at.
- Book your first job.
- Do the job, then invoice it and get paid.
- (When you're ready) Connect card payments and, in AU/NZ, Xero.
That's it. Everything else - quotes, safety paperwork, stock, the schedule - you add as you need it.
Follow along in the app
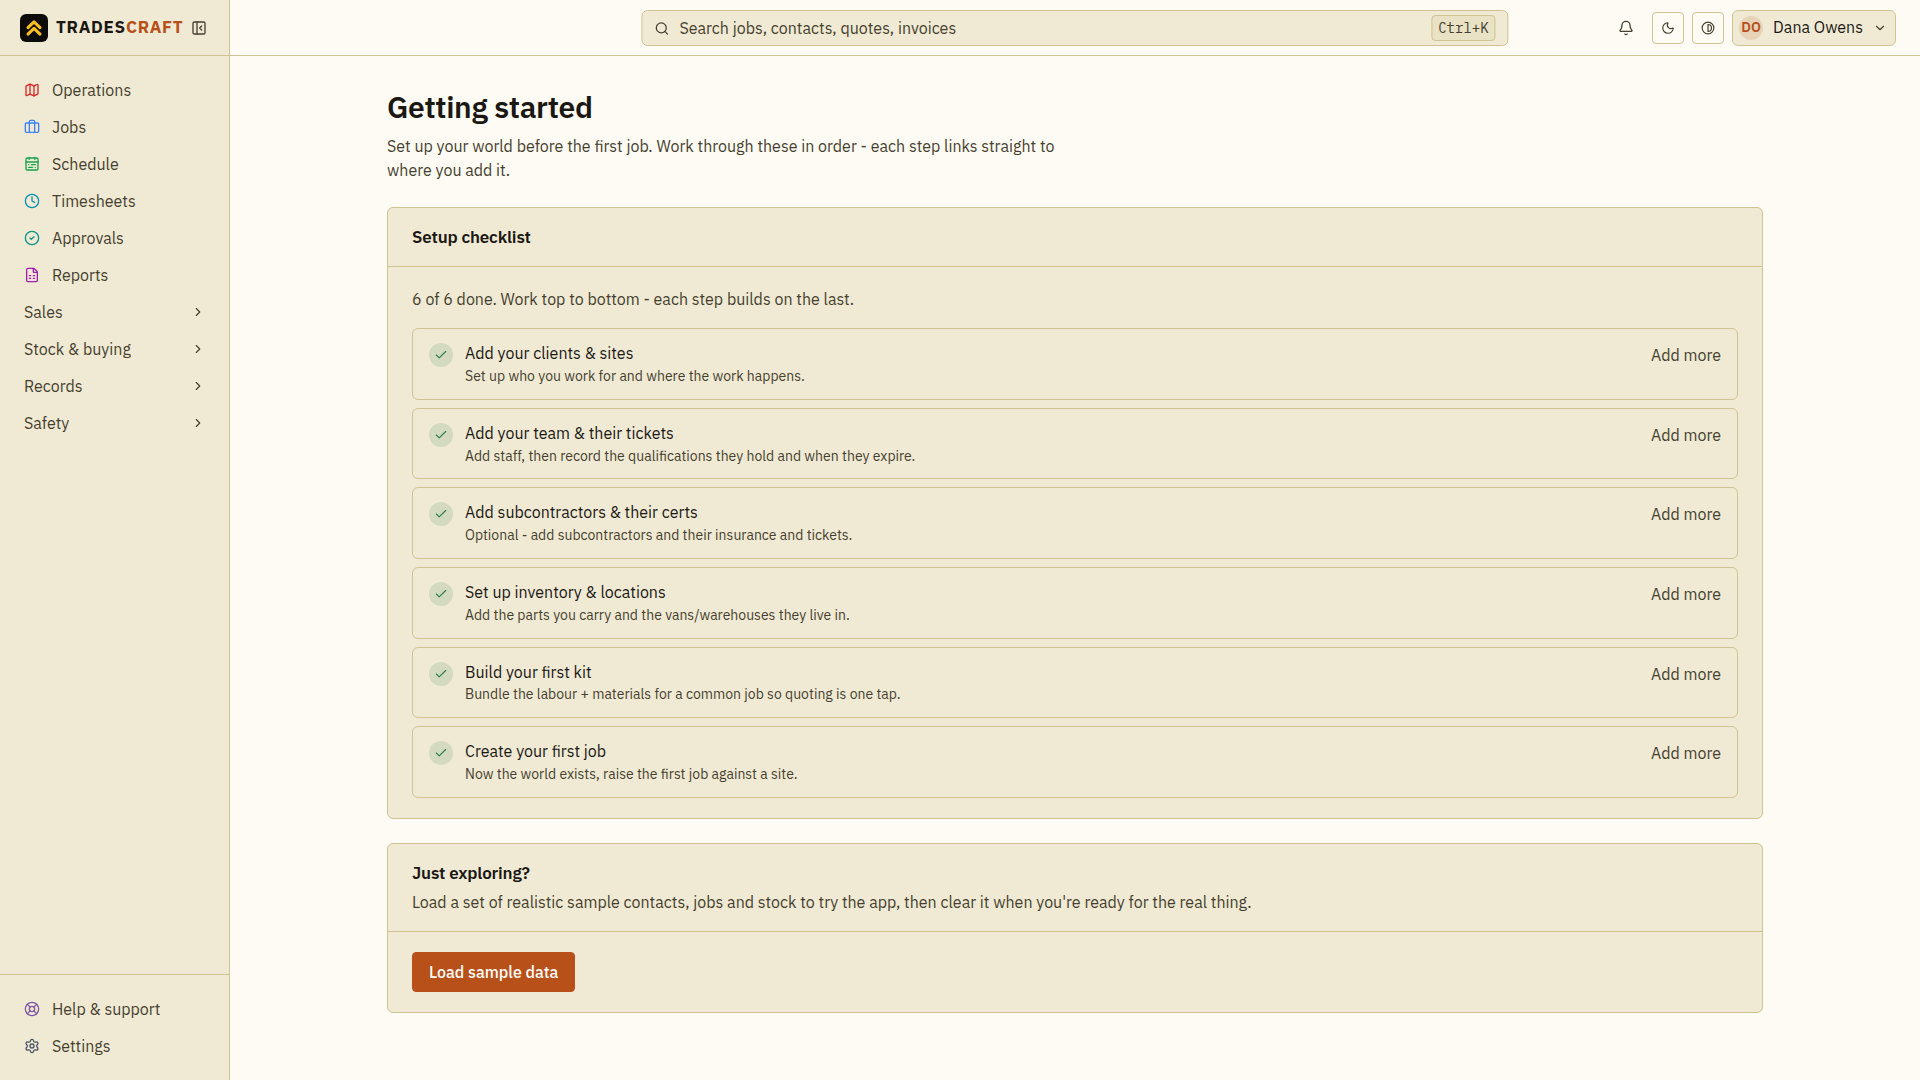
Tradescraft has this same roadmap built in as a guided checklist. Open it any time from your name (top-right) -> Getting started. It walks the setup in the right order - clients & sites, your team & their tickets, subbies, inventory & locations, your first kit, then your first job - and ticks each step off by itself the moment your account has it, so you can always see what's left. Each step links straight to the screen where you add it.
Sign in
If the boss invited you, you got an email to set a password. Setting up the business yourself? Use Create an account on the sign-in screen. → Signing in
If your invitation opens “Set up your business”
This form appears when your signed-in account still needs a business of its own. Check the email shown first. If you meant to join an existing team, sign out and use the address that team invited instead of creating another business.
- Enter your name and business / trading name.
- Choose the business country and, for the United States, its state. The country cannot be changed later, so check it before continuing.
- Set the tax-registration choice to match your business and enter the optional Australian ABN if applicable. Ask your accountant if you are unsure.
- Choose Create my business and wait for the next screen. Complete any password or security setup offered, then continue below.
If setup reports an error, follow that message and retry the same form. For the usual self-service sign-up, follow Create your business account.
Set up your business
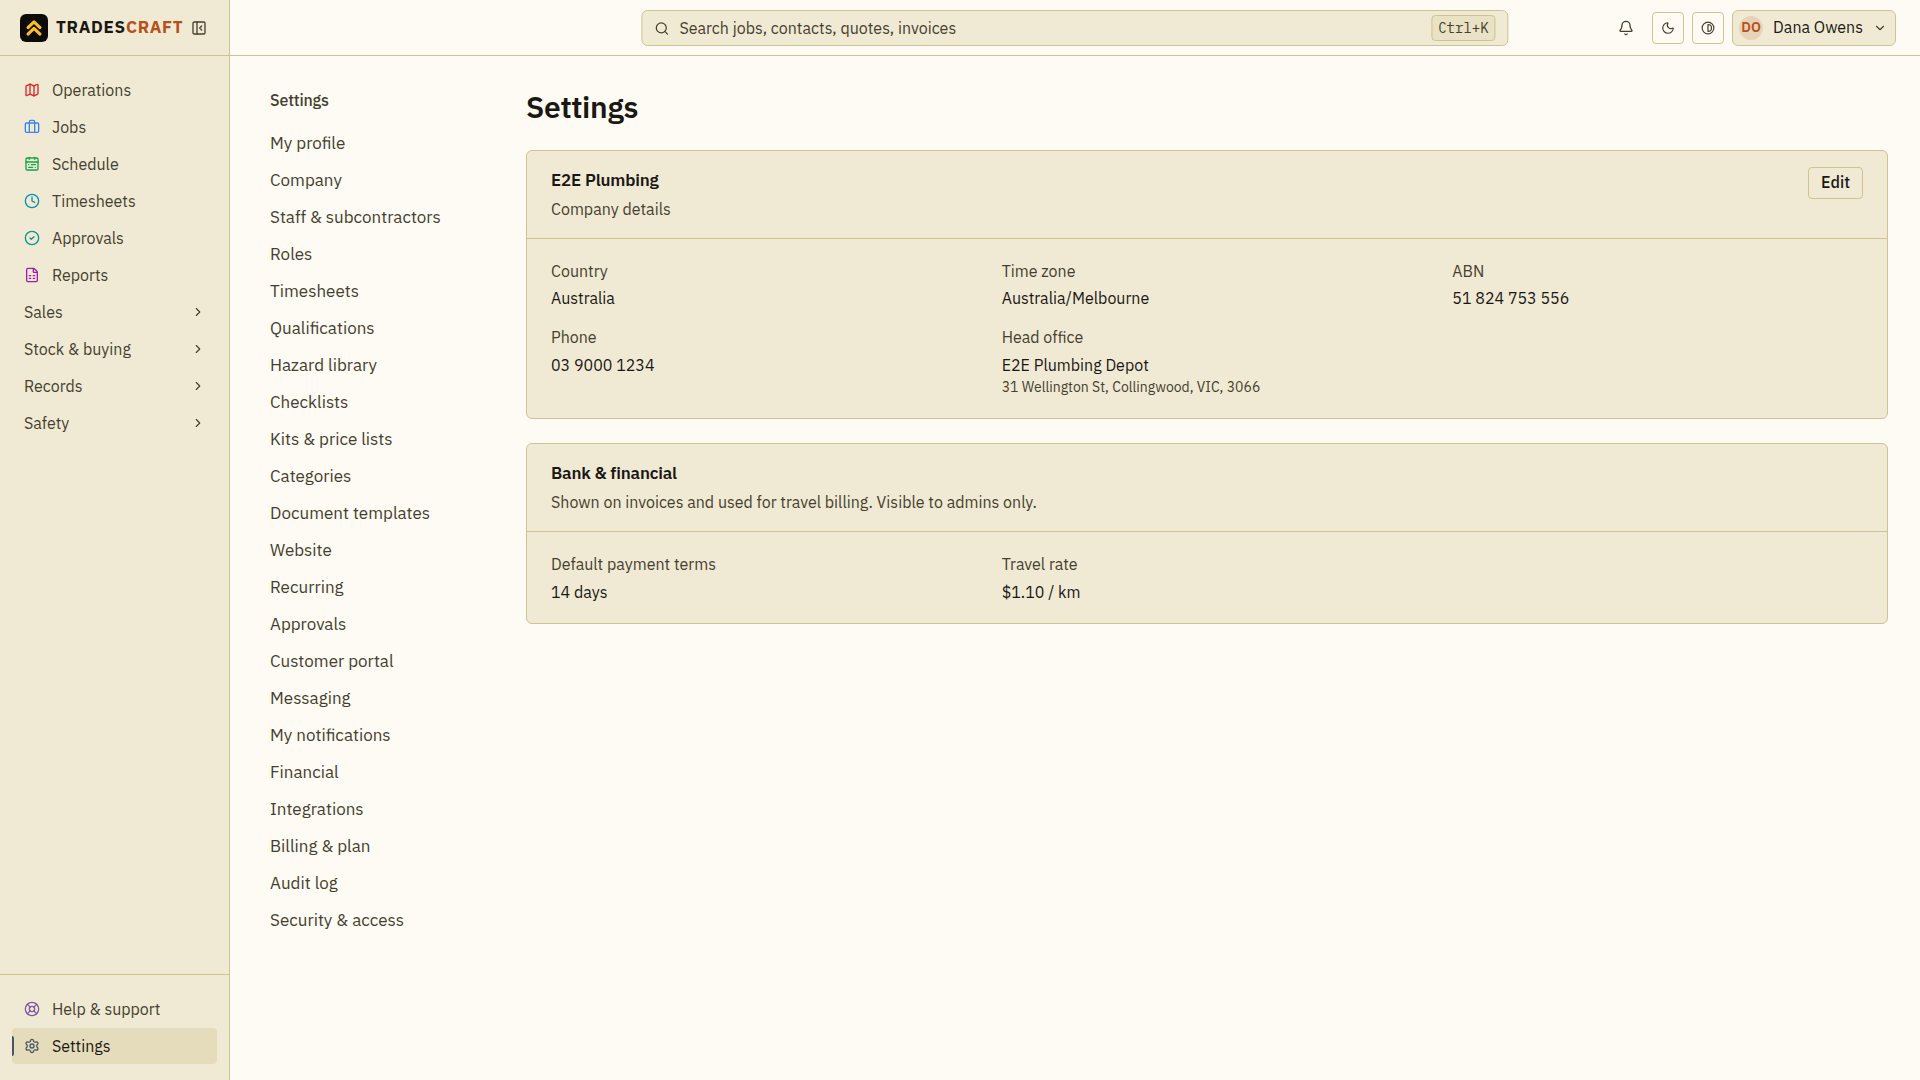
Open Settings. This is your business's control room - company details, your logo, your team, and everything else. Start with Company and fill in your business name, country, business number and address - these print on every quote and invoice you send. A US business also chooses its state; Tradescraft then uses USD, US address labels and state-aware time-zone defaults.
Add your team (if you have staff)
Working solo for now? Skip this. Otherwise, invite each worker so they can be booked on jobs and clock their time. Each person gets a role that decides what they can see and do. → Add a worker
Add your first customer and site
Before you can book a job, Tradescraft needs to know who it's for and where it is. So you always add a customer first, then a site (the address you'll work at) under them - a job can't exist without both. It's a two-minute job and you only do it once per customer. → Add a customer · Add a site
Book your first job
Now create the job against that customer and site. Give it a title, a quick description, and what you reckon it'll cost. The job is the heart of everything - it's where you log time, book crew, attach safety paperwork and, later, invoice from. → Create a job · Run the job
Invoice it and get paid
When the work's done, raise an invoice straight from the job. Send it to the customer, and record the payment when it comes in - or let them pay by card online. → Create an invoice · Send it & take payment
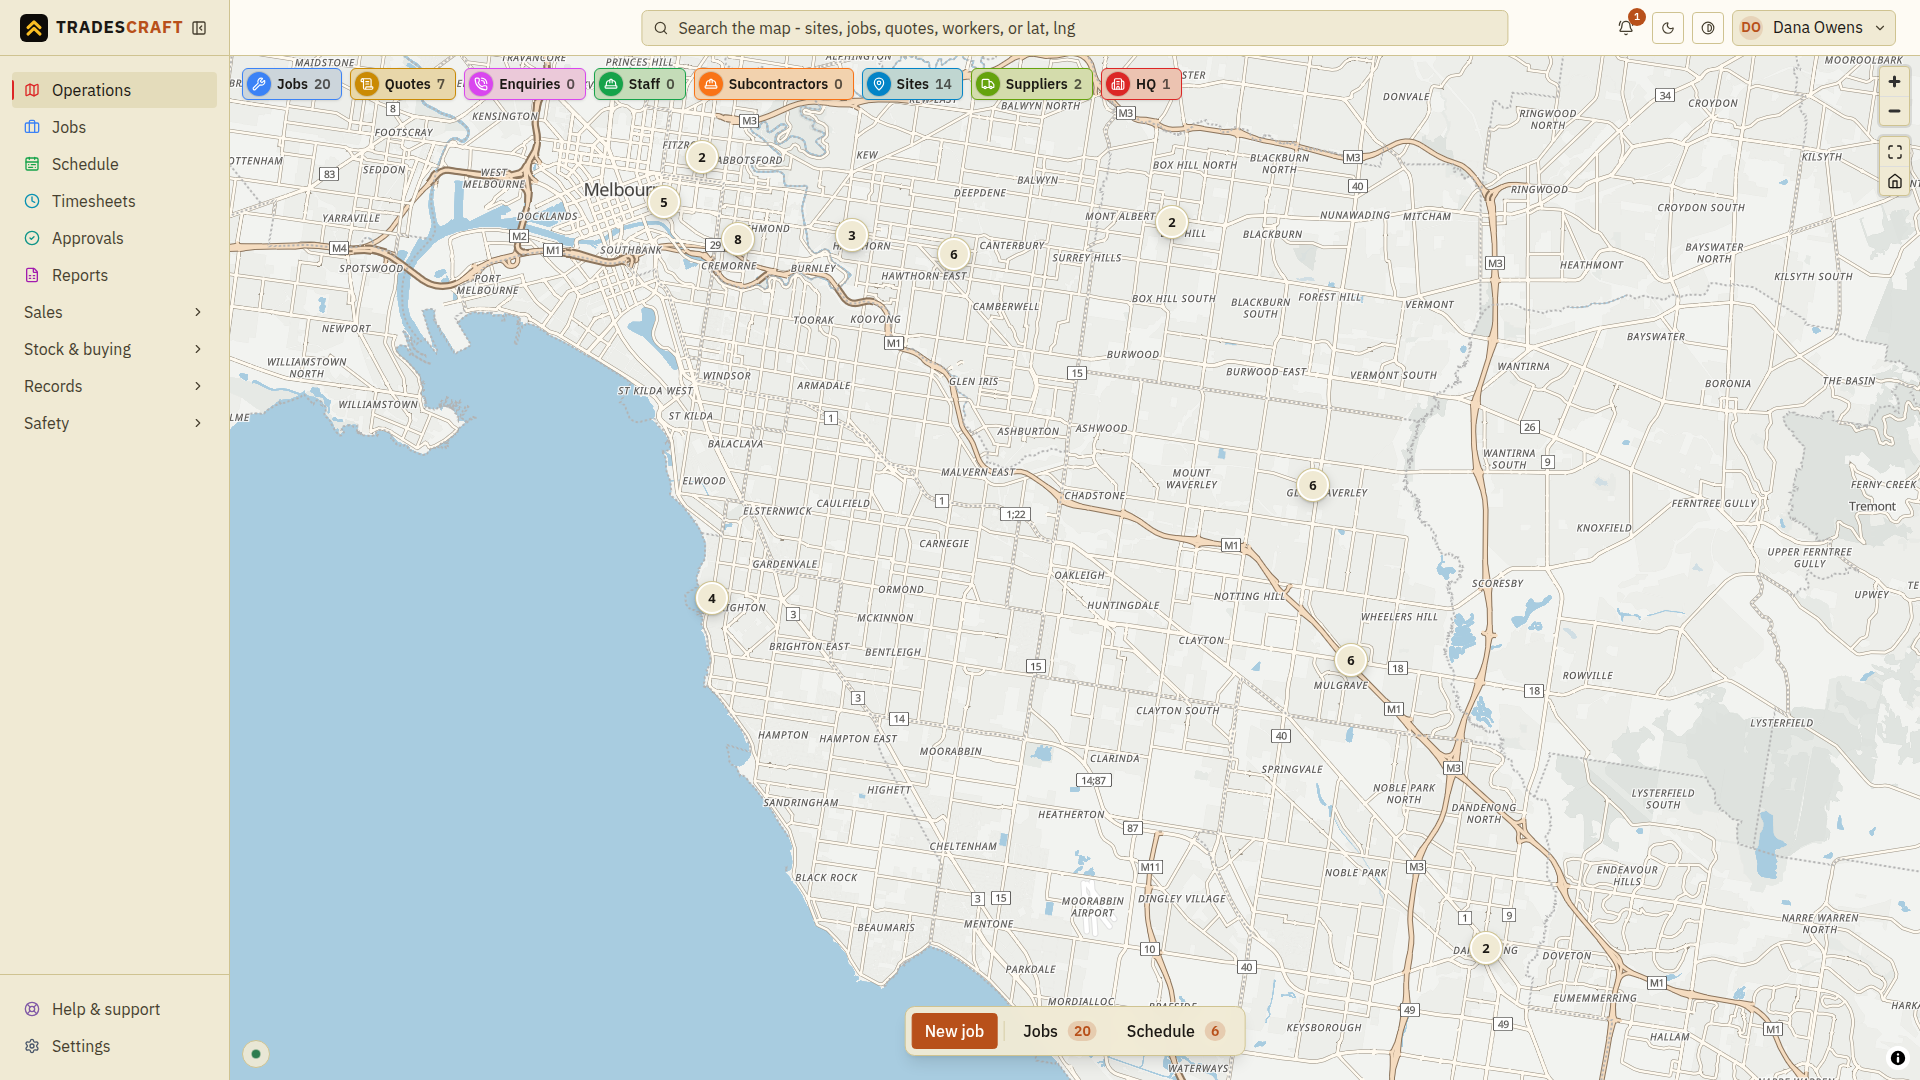
You're now running jobs in Tradescraft. They show on the live Operations map and your Schedule, so you can see the whole business at a glance.
Connect payments and accounting (when you're ready)
Not day one, but worth it soon:
- In Australia or New Zealand, connect Xero so your invoices, bills and customers sync to your accounting - no double-entry. Xero is hidden and disabled for US accounts. → Connect Xero
- Turn on card payments so customers can pay invoices online by card. → Integrations
What to add as you grow
You don't need these to start, but they're there when you do:
- Safety (AU/NZ) - prepare the country-appropriate JSA/SWMS or Task Analysis, then enable its clock-on requirement when the crew must acknowledge the current version before time starts. This AU/NZ compliance workflow is not shown to US accounts.
- Stock - track parts in your inventory and on your vans.
- Your own website - an optional public-site add-on, set up under Settings, which also lets you opt into the public directory. The customer portal is a separate core feature.
Good to know
- Opening a list or record lets you inspect it. Save, Send, Delete and similar actions can change records or contact customers; review the details before using them. Use sample data for practice.
- Do it in any order that suits you - this is just the smoothest path. The one rule Tradescraft holds to is customer → site → job: a job always belongs to a site, and a site to a customer.