
Use a Transfer when you already own the stock and are moving it. For a new delivery from a supplier, use Receive stock instead. Both locations must exist before you transfer; add a missing location under Stock locations.
Open the item's movement form
Open Stock & buying → Inventory, choose the item and find Post a movement. Choose Transfer. Check the item's name and code before entering quantities.
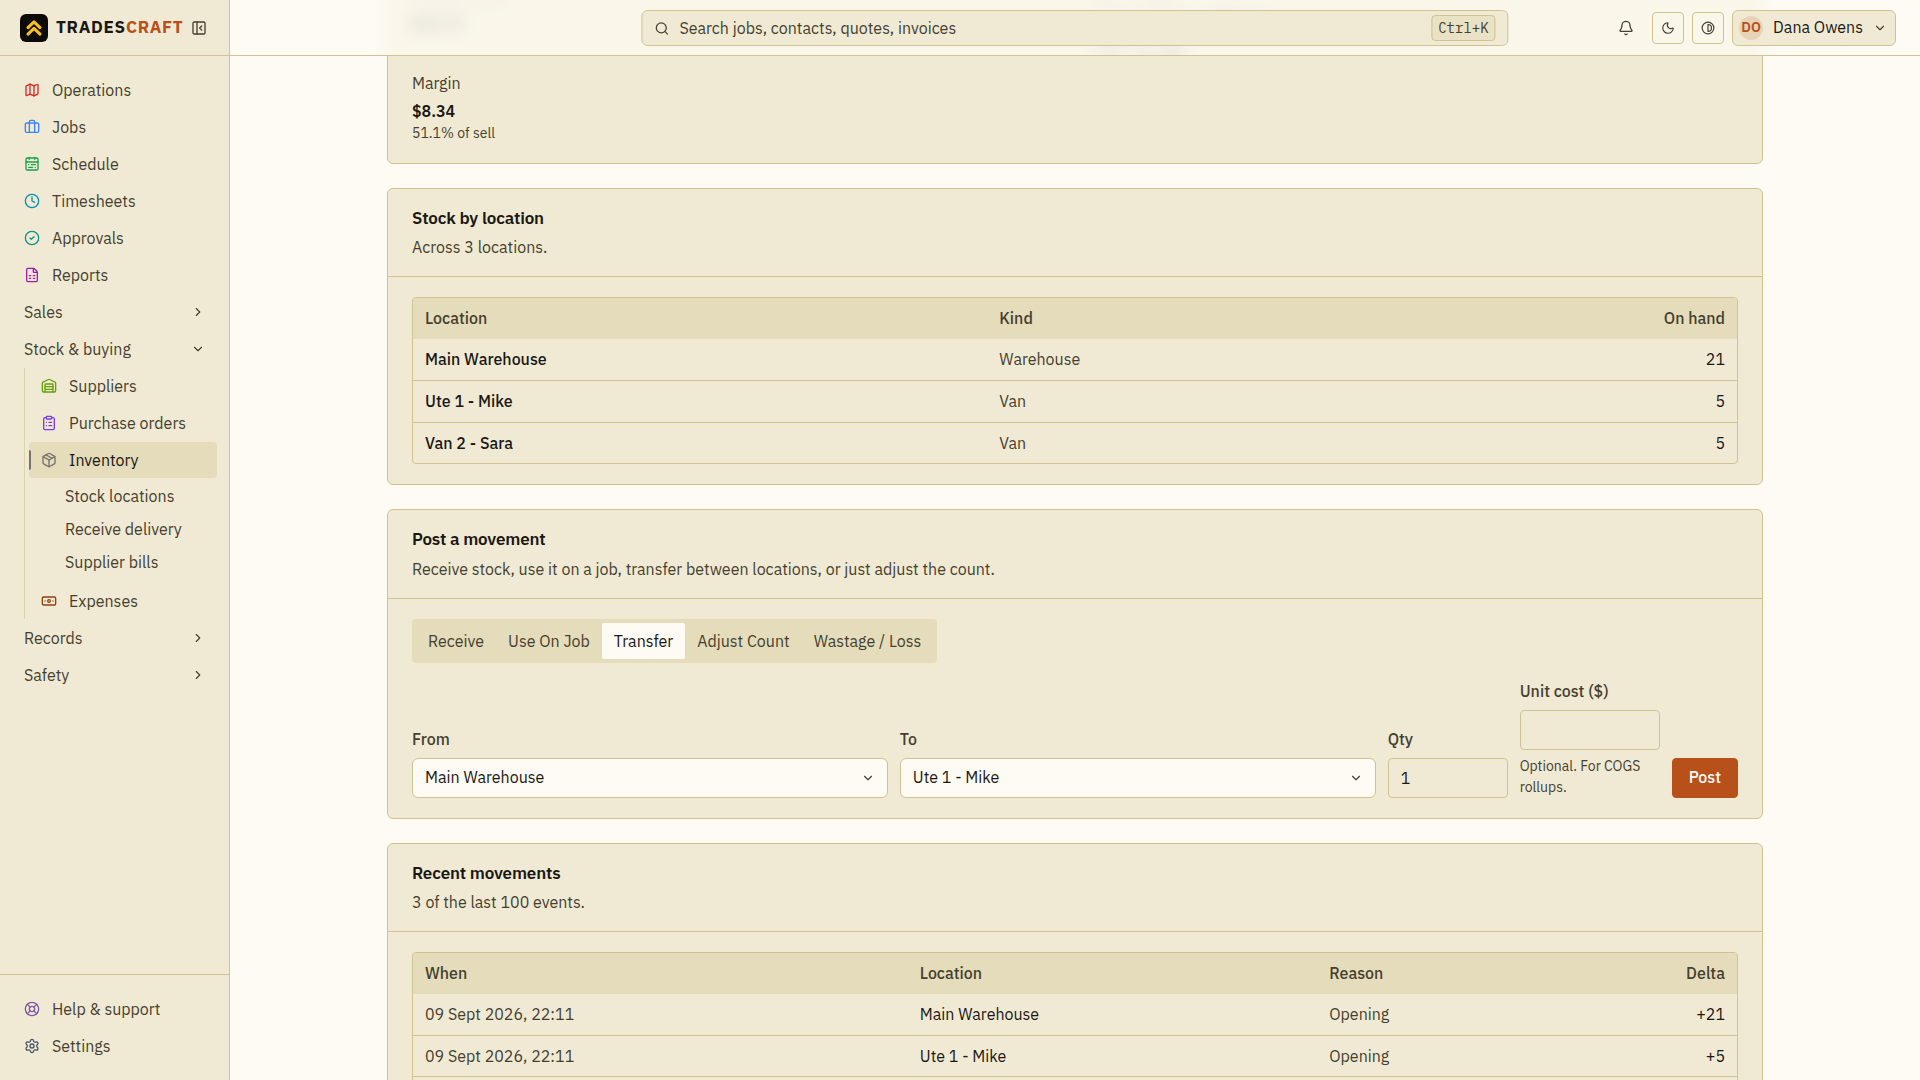
Enter the move
- In From, choose the location the parts are leaving.
- In To, choose the location receiving them. It must be different from From.
- Enter Qty: the number of units being moved. For example, to move 4 of the warehouse's 10 fittings into a van, enter 4.
- Enter Unit cost (optional) only if you need to record a specific cost per unit. This is a cost to your business, not the customer's selling price.
Post and check
Choose Post and wait for Stock moved. Check the item's movement history and stock at both locations. In the example above, the warehouse falls from 10 to 6 and the van gains 4. The business's total stock does not change.
If the form reports an error, check the locations and quantity before trying again. After a connection failure, check the history before entering a second move for the same parts.
Other buttons under Post a movement
- Receive adds the quantity entered to one location. For a supplier delivery with several items or a bill, follow Receive stock.
- Use on job removes the quantity from stock. The item-page form does not choose a job. To charge the material cost to a particular job, open that job and follow Log time & materials.
- Adjust count adds the positive quantity entered as an adjustment. It does not replace the count with that number. To enter the actual number on the shelf, including zero or a lower count, use Stocktake.
- Wastage / loss removes lost or damaged stock. Follow Write off stock and check the saved reduction.
Choose one workflow for each change. Do not record the same delivery, job usage or stock correction in two places.