
Open Timesheets from the menu. Entries come from workers clocking on and off on a job; browsing this page does not start or stop a timer.
Choose the period
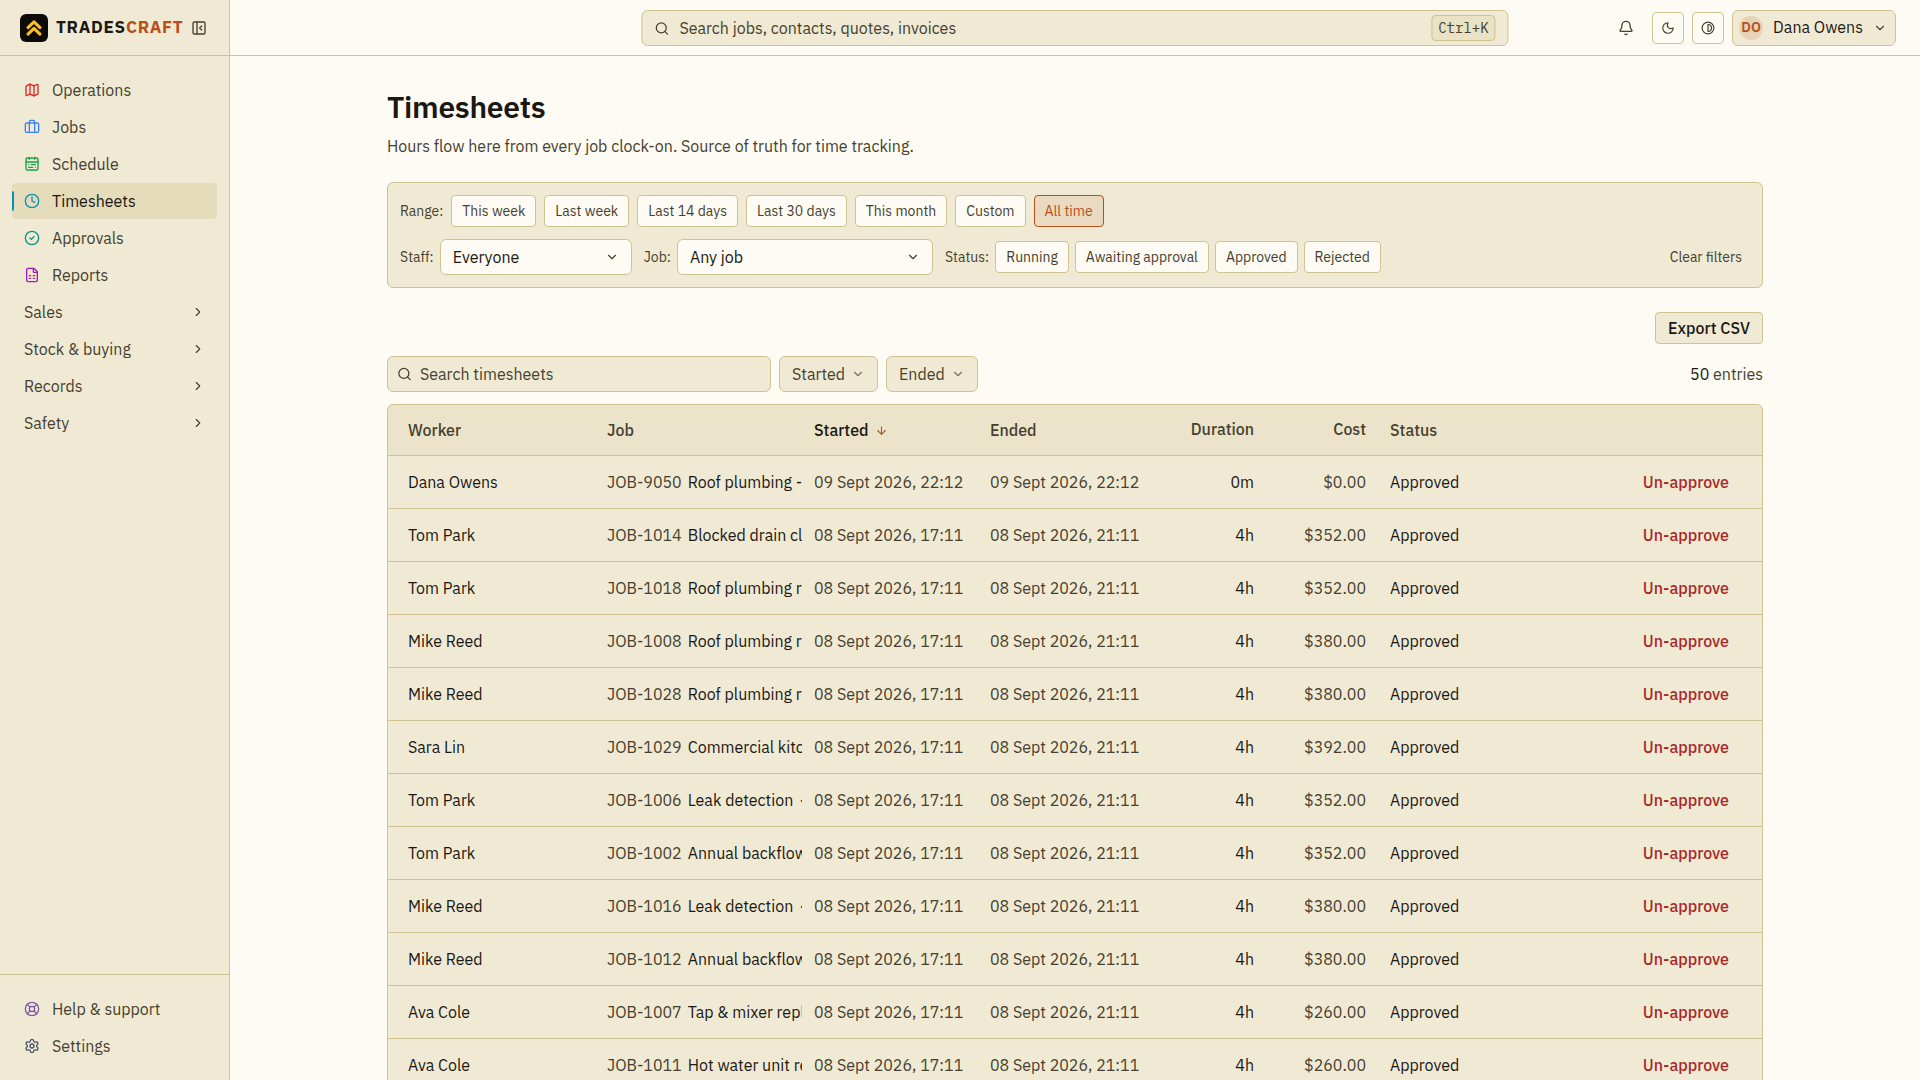
Under Range, choose This week, Last week or another preset. For a specific pay period, choose Custom and enter both From and To dates. Check the selected dates before comparing totals or preparing an export.
Find the entries
Use Staff to select a person when your role can see the team, and Job to narrow to one job. Use the Status buttons to find running entries, time awaiting approval, approved time or rejected entries.
Read the worker, job, start/end times and duration together. A running entry needs to be clocked off before its finished duration can be reviewed. Use the job reference to return to the job if you need its context.
Use Next and Previous below the table when there are more than 50 entries. The table, displayed totals and export cover the loaded page, so review every page needed for the period.
Review what happens next
If your role can approve time, follow Approve timesheets. When the pay period is ready, follow Export timesheets and check the downloaded file before importing it into payroll.
If hours are missing, clear the filters and try All time to locate the entry. Check whether the worker clocked on to the intended job and clocked off. Ask the worker or administrator to resolve an incorrect record; a filtered-out row is not evidence that no work occurred.