
The customer portal gives customers a separate login for their work with you. Open Settings → Customer portal to invite users and choose which sites they can see. No website add-on is needed.
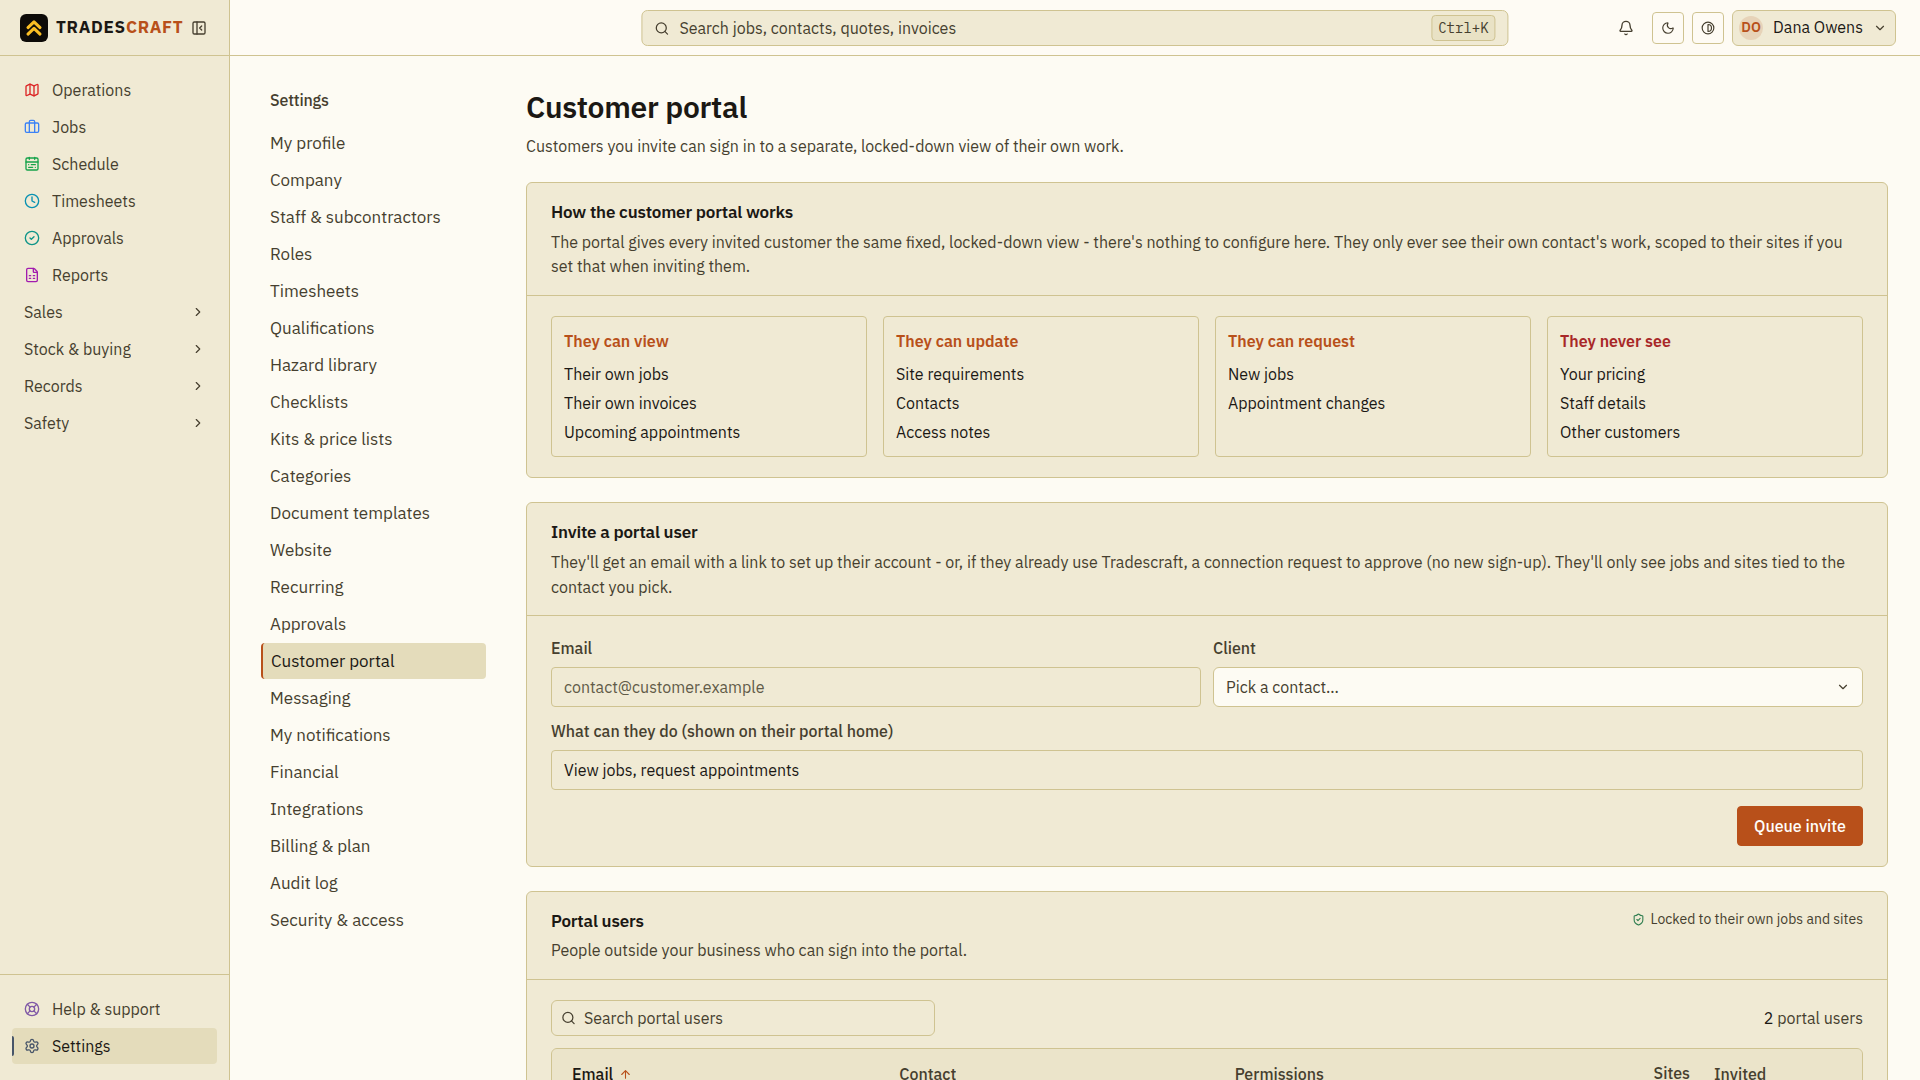
Invite a customer
You need permission to manage portal access and an active business subscription or trial.
- Under Invite a portal user, enter their Email and select the Client whose records they should see. Check the client carefully before continuing.
- In What can they do (shown on their portal home), write a short explanation for the customer. This text is a description; changing it does not grant or remove permissions.
- Optionally choose Restrict to specific sites. An empty selection gives access to all of this client's sites; selecting sites limits access to just those sites.
- Choose Queue invite and read the confirmation. Delivery is queued, so saving an invitation does not mean the email has already arrived.
A new user follows the invitation to set up their login. Someone who already has a Tradescraft login receives a connection request to accept in their portal. They can switch between businesses connected to their account. All customer portal users must set up two-factor sign-in (an extra check when signing in) before opening their jobs or documents.
Choose which records they can use
Open the client's details page, then find Portal access. Each invited user has separate switches for View invoices, View quotes, View jobs and Pay invoices online. Change the required switch and wait for the result; check that the saved switch reflects the access you intended.
Customers can see their own customer-facing prices and totals when permitted. They do not get your internal costs, margins or staff administration. Depending on their access and the record's state, they can approve or decline quotes, request visits, update site contact/access information and pay eligible invoices. Online payment also needs your connected Stripe account to be ready.
Change site restrictions or notes
- Under Settings → Customer portal → Portal users, open the user and choose Edit.
- Update Permissions summary, Notes or Scoped sites (the list of sites this person can see). The summary describes their access; use the client's Portal access switches to change record permissions.
- Choose Save changes. Check for Portal access saved. If the message says notes saved but site access failed, retry the site restriction and verify it before relying on it.
Remove access
Open the portal user, choose Edit → Remove access, review the email address and confirm Remove. Check the removal confirmation. This removes their connection to your business; it does not erase their account with other businesses.
In billing read-only mode, access removal and declining a pending invitation remain available. New invitations, accepting or restoring access, permission changes and changes to which sites someone can see need an active subscription or trial.
If an invitation is missing
Check the email and the access status under the client's Portal access card. An existing user should check their portal for a pending connection request. For a new user, use the available resend control after checking their spam folder. Never ask a customer to send you their password or authenticator code.